
New Orleans Jedi - Ice's Personal Lightsaber Build with all the Options!
- Oct 28, 2017
- 3 min read

During the last 6 months while creating our lightsaber build labs, I have come to appreciate some of the really nice features that some lightsabers I've seen have.
Typically, the ones I build for our members are generally entry level lightsabers. These don't usually come with all the options out there. mainly to save money. Our entry level custom hand made saber is considered very affordable compared to the average price of the general lightsaber someone might buy online. The average price out there for a nice modern lightsaber is around $400, and it goes all the way up to $1500. Ive made it my mission to include as many nice options on our entry level saber as I could for a total cost of a fraction of that $400 price tag.
my intent was to make a really nice collectible one that would be carried by those members in our annual parade.
The lightsaber in this article is not an entry level one. Its the most complicated and expensive one i've built so far.
First I purchased a desired hilt design for the number one lightsaber merchant online. My work station just isn't set up with a lathe or the tools necessary to create one with this look.
The hilt came completely empty. I created and used a RGBW emitter. It's capable of producing many colors as it mixes Red, Green, Blue & White together to get the desired effect.
One of the drawbacks of really nice lightsabers, is the cost of the circuit board, called Soundboards. The best one out there right now costs around $160. That one does just about anything you ever wanted to do with it. Unfortunately, those boards are out of our price range, and also require an extensive set up using a PC. I was able to find a soundboard merchant in NYC that offers some of the best options, yet eliminating the things we wernt interested in. The soundboard I used in this build cost me about 3 times the cost of the ones I use in the entry level sabers. So, it still was very affordable.

As you can see it comes with a system to hang it from the belt, making it much easier to carry at parades and cosplay events.
That circle at the top is the recharging port, which means I dont have to take out the lithium ion battery. I just plug in the usb cable and the main switch's angel eye light blinks to let you know the status of the charging process. I used a Japanese Lithium Ion battery that holds a big charge and lasts for 1000 charges.
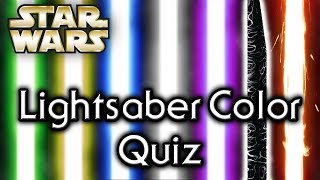
Check out the videos below, as i select various blade colors.
I added an interactive switch on the reverse side of the main switch, in order to initiate the clash feature without having to bang or jar the saber.
A really nice benefit of having the white in the emitter, is that it is set to flash white when I initiate the clash option. Typical entry level soundboards just flicker when clashing.
As always, I created it with a heavy duty thick (dueling style) blade. In this way, you can duel with other lightsabers without causing damage to the blade. Just another way to make is as interactive as i can.
It comes complete with a very loud base speaker (3 watts), and the soundboard have a vibration motor on board to give it a more realistic feel. There are several sound folders & modes to choose from when setting it up. You can even select a silent mode, called stunt mode, generally for dueling.
In this video, I demonstrate how easy it is to charge it using the USB cable.
All in all, it came out exactly as I wanted it to, and I absolutely love all the options I included with it. Thanks for checking it out.
May the Force be With You


Comments